1. Basic Product Information
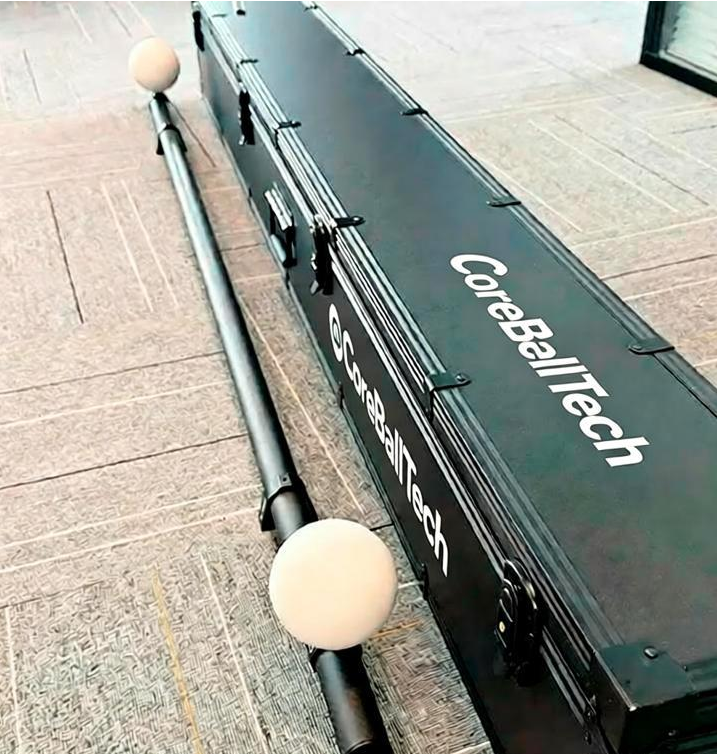
- Ball Diameter: 100mm
- Length: 1500mm
- Product Code: CBT001
- Parameters: Customizable (can be adjusted according to demand for ball diameter, length, material, etc.).
2. Metrological Characteristics and Calibration Dimensions
The core calibration of the standard ball bar focuses on ball diameter, spherical surface shape error, and ball center distance, ensuring the measurement accuracy of three – dimensional coordinate measuring systems.
3. General Calibration Specifications Support
Calibration is based on industry – authoritative specifications to ensure technical compliance:
- Calibration specification for optical three – dimensional measurement systems based on structured light scanning
- Calibration specification for articulated arm coordinate measuring machines
- Calibration specification for three – dimensional profile optical scanning measuring instruments
- Calibration specification for coordinate measuring machines
4. Application Scenarios and Core Value
The standard ball bar is a calibration benchmark tool for three – dimensional coordinate measuring systems (such as three – coordinate measuring machines, optical scanners, etc.). By precisely calibrating the ball diameter, spherical surface shape error, and ball center distance, it provides a “ruler” for measuring systems, ensuring the accuracy and reliability of subsequent measurements.
5. Calibration Method Breakdown
The calibration process is divided into two key steps: measurement and result processing, ensuring data scientificity:
(1) Measurement Phase
- Fixing and Point Selection: Place the standard ball bar on the coordinate measuring machine workbench, and select 25 measurement points on the surface of ball 1 (distribution logic: 1 point at the pole + 4 points at 22.5° below the pole, 8 points at 45°, 4 points at 67.5°, and 8 points at 90° (equator), with each group of points rotated by 22.5° to cover the spherical surface). Repeat the operation to obtain the point set data for ball 2~ball n.
- Notes: Avoid the ball handle part during measurement, and the point distribution can be flexibly adjusted according to actual needs.
(2) Result Processing Phase
- Fitting Sphere: Use the least – squares method to fit a sphere for the coordinate point set of each ball, outputting the ball center coordinates and diameter.
- Ball Diameter: The diameter of the fitted sphere is the ball diameter of each ball on the standard ball bar.
- Spherical Surface Shape Error: Calculate the distance between the measurement points on the ball and the center of the fitted sphere. The difference between the maximum distance and the minimum distance is the spherical surface shape error.
- Ball Center Distance: Calculate the distance between the ball centers through the ball center coordinates of the fitted spheres.
6. Ball Material and Surface Characteristics
The ball of the standard ball bar can be made of materials such as steel, hard alloy, ceramic, and the surface can be polished or diffuse (this product is matte ceramic). Different materials and surface characteristics adapt to different measurement scenarios (for example, ceramic balls are wear – resistant, and matte surfaces are suitable for specific optical measurements).

